Have you ever wanted to garden during the winter? Winter Sowing is an easy and resourceful way to
grow seedlings! You only need a few supplies and a small space outdoors.
Supplies:
- Clear container(s) – reused plastic containers such as milk or water jugs (without lids), to-go containers from restaurants, or even deep aluminum pans with plastic lids
- Potting mix (designed for container gardening)
- Optional: newspaper or coffee filters to line the bottom of the container
- Equipment for cutting a plastic gallon jug like scissors or hobby knife, and equipment for drainage holes like a drill, hot screwdriver, tip of hot glue gun, etc.
- Heavy tape like duct tape or clear packaging tap
- Paint pen, laundry marker, grease pencil or wax pencil, for weather-proof labeling on the plastic
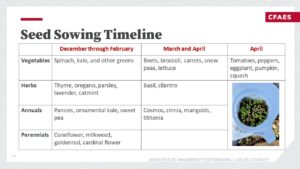
- Seeds. Opt for plants that can handle the cold. Seed catalogs and seed packets might have descriptions such as “hardy” “direct sow in early spring” “can withstand frost”. If you notice that certain plants “reseed” or “self-sow” themselves the following year, they will probably be good options for Winter Sowing.
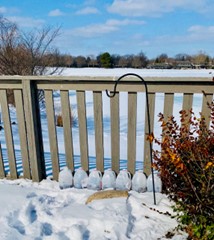
- Location to set them outside. They need sun, rain (and snow), as well as protection from wind and wildlife.
10 Steps to Winter Sowing
- Collect clear, plastic containers and wash them well.
- Cut or drill small holes in the bottom of container for drainage. (5-10 holes depending on size). If it is a container like a milk or water jug, you will leave off the lid for air and venting. If it is a food container with a plastic lid, you will also need to add holes in the top for air and venting.

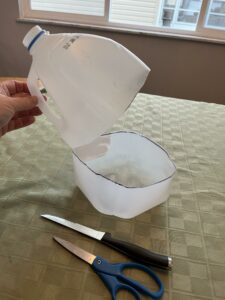
- If you’re using a milk or water jug, use scissors or knife to cut the container in half along the middle section. This cut will be under the bottom of the handle (this will leave a depth of approximately 4 inches from the bottom of the container to the cut). Cut around the container, except for about an inch of plastic to leaving the handle attached. This little piece of plastic will create a hinge between the bottom and top of the growing container.
- Optional: Add a coffee filter or piece of newspaper to the bottom of container if you want to avoid slugs or if your drainage holes are large.
- Add approx. 3-4 inches of potting mix (important to use “potting mix”) and water thoroughly.
- Sow one type of seed in the container, making sure to give enough room to grow. Depending on the type of plant and seeds this might be about 10 -25 seeds per container. While the container should also be labeled on the outside, consider using a wooden stick or label on the inside to name the plants.
- Once seeds are planted, use tape to connect the container back together. Use a weather proof marker on the top and bottom of the container to label the seeds. Add the date of planting.
- Place containers without their caps outdoors in a sunny or part sun/shade location. Check on them weekly. If they get too dry, open and spray with water, then seal back up. If they get to wet open and dry out, then tape back up.
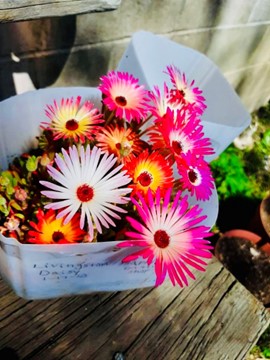
- As spring approaches, watch for the tiny seedlings to emerge! As the weather warms, you can open the container during the day and then close again during cool nights. Once, they continue growing and you see two sets of leaves appear, leave in container to acclimate for 1 –2 days.
- Transplant to garden, raised beds, or containers for the gardening season. Enjoy the efforts of your early gardening!

Recently, the Ohio Victory Gardens Program, posted a blog on, “Winter Sowing, to fend off the winter blues”. You might be interested in following their blog as they will be announcing spring 2024 sites of free seed distribution!


